Teaching & Learning Engagement in Architecture & Interior Architecture Programs
School of Architecture & Built Environment, UCSI University
The Art of Craftsmanship
The process of constructing a boat requires meticulous handywork and precise usage of tools. The Pangkor boat makers have mastered multiple tools and techniques which are essential in crafting each of their respective boat components, resulting in a finished product of which every component has been handcrafted by seasoned experts.
Let us dive into each of these handcrafted arts.


Measuring & Marking
Drawing & Tracing
Sawing
Starting the production process, the boat maker would select a wood plank of suitable size and thickness. He would then use an existing template respective to the part he is trying to produce. The templates produce lines with a variety of angles and lengths.
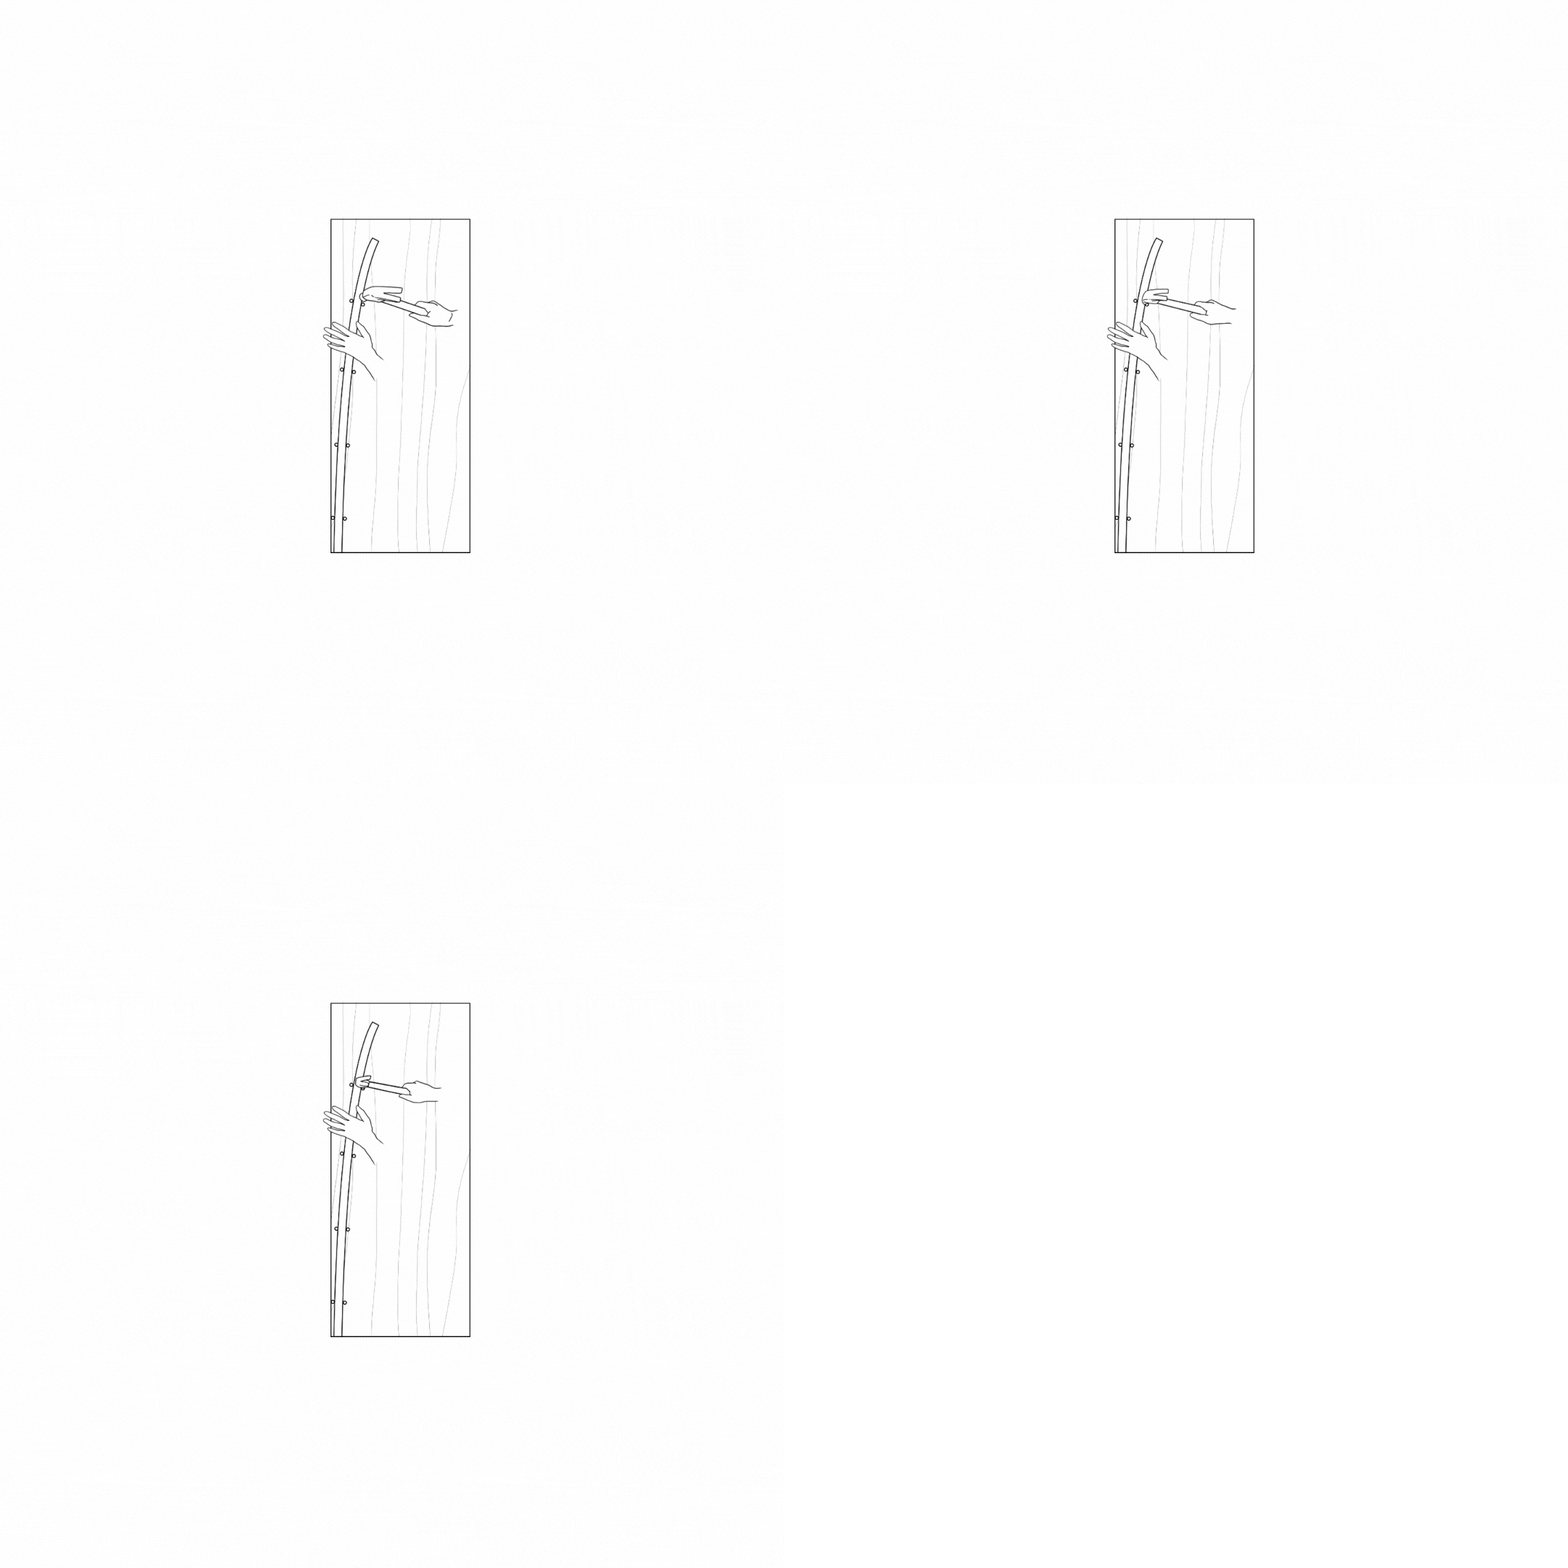
A long, thin piece of wood strip, a few short stainless steel nails, and a f-clamp (if possible; this mostly relies on how difficult it is to bend the thin wood strip) are required to define the curve line. The wood strip should first be placed inside the chalk line.
Then, using a hammer, we must temporarily fasten several small stainless steel nails to the wood strip (in a curve or a straight line) in order to stabilize and maintain it in place. These nails should only be 5 mm deep into the main wood plank
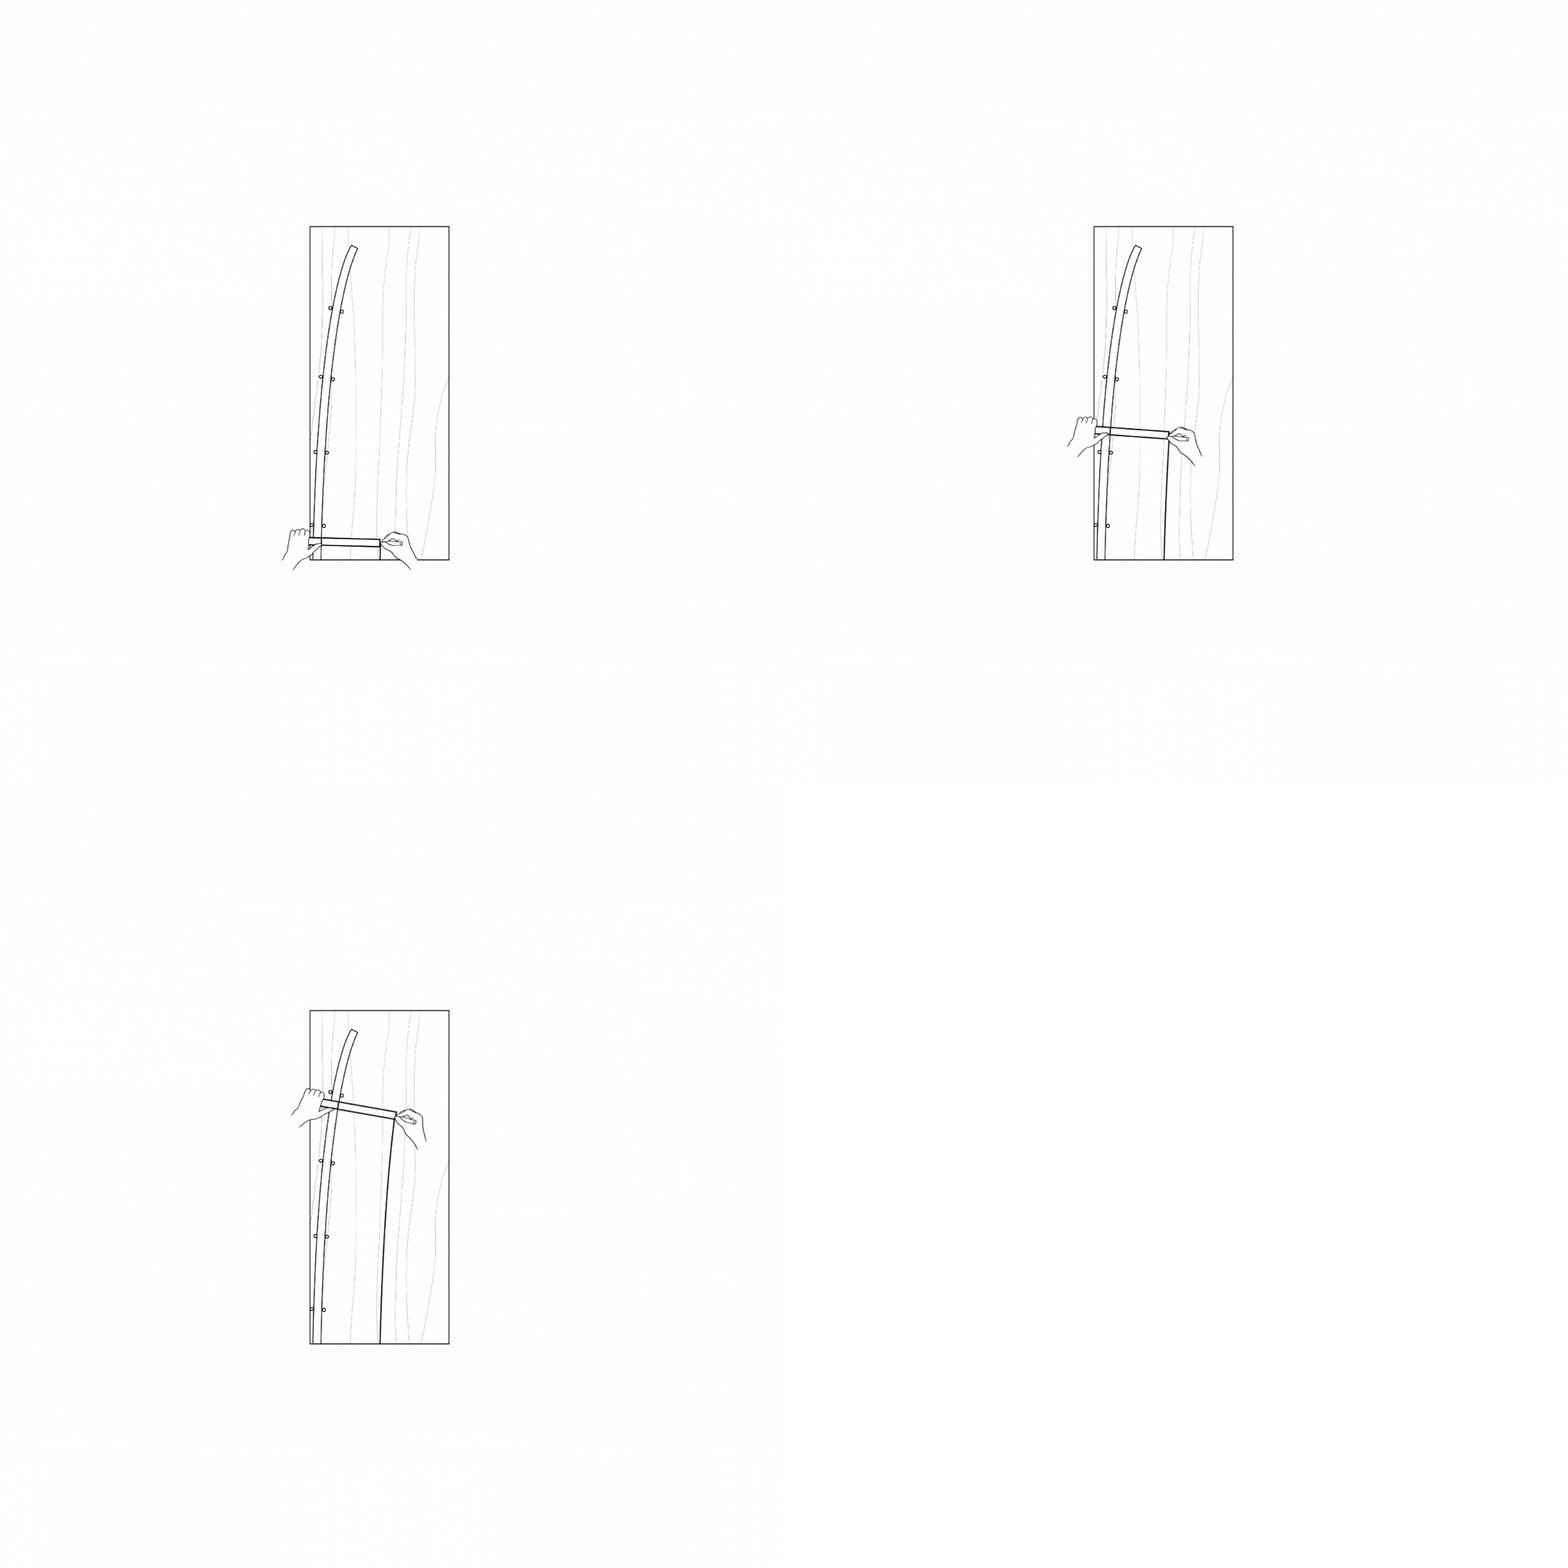
After comes the marking process where the wooden plank is drawn across the now nailed-in template, using an L-Square.
The L-Square must first be placed in line with the angled line. Next, sketch out the measurements shown on each distinct line. The L-Square and template must be simply adhered together tightly.
At the end of the wood piece is a piece of chalk that serves as the drawing motor. The chalk drags in the same direction as the wood piece. So, a saw is ready to cut a clean and accurate template drawing.
Cutting would be the next step. Builders need a chainsaw to cut out the drawings and tracings during the sawing procedure. Since the thickness of the chalk line coincided perfectly with the thickness of the chainsaw cut area, the builder is using chalk to draw and trace.
Sawing operations must take place close to the region where electrical sources are supplied, which is also the workers' rest area.
Shaving
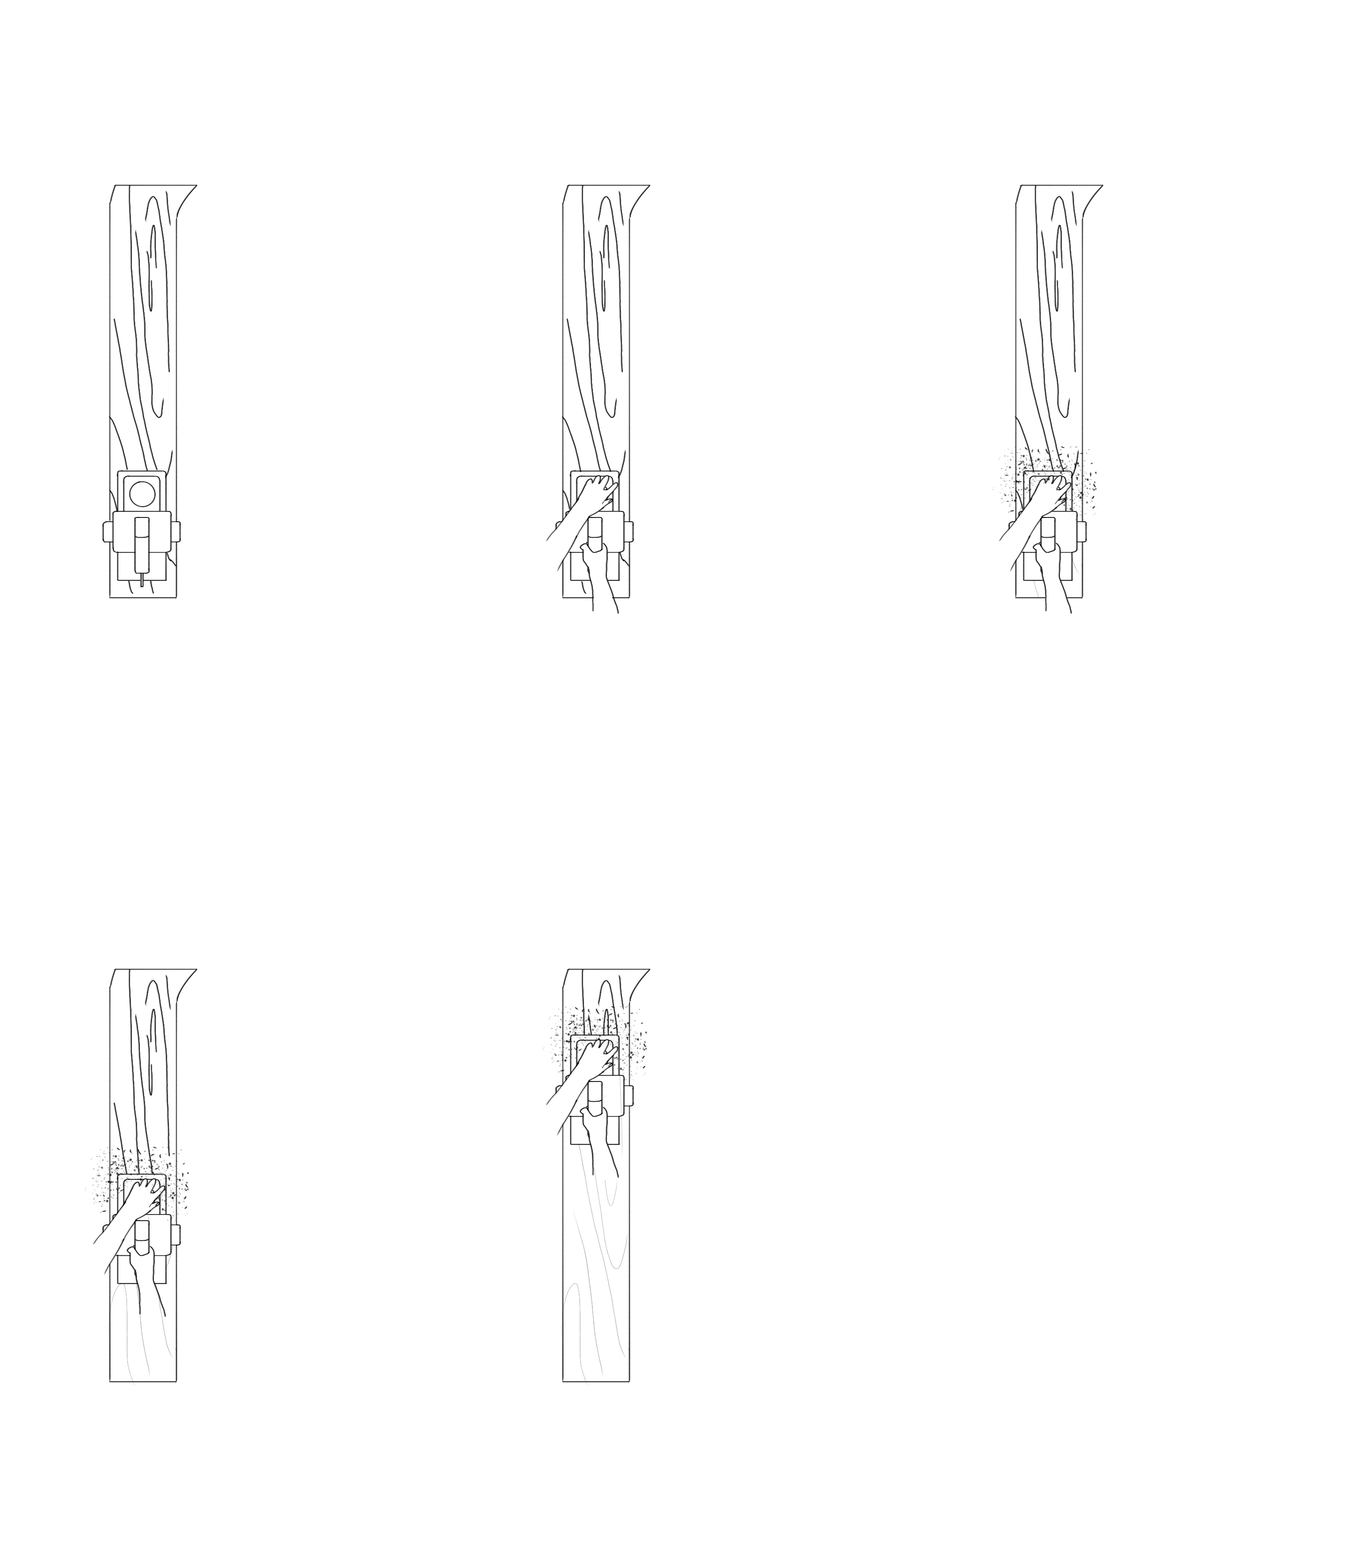
Following the sawing process comes the initial phase of shaving. They need to level out the uneven surface in this round. Using an L-Square, inspect surfaces and edges at 90 degrees to make sure they are straight and smooth.
After many layers of shaving, the boat parts are tested by installing them on the boat itself and seeing the areas which require more smoothening out, after testing the wood will be put through another process known as shaping.
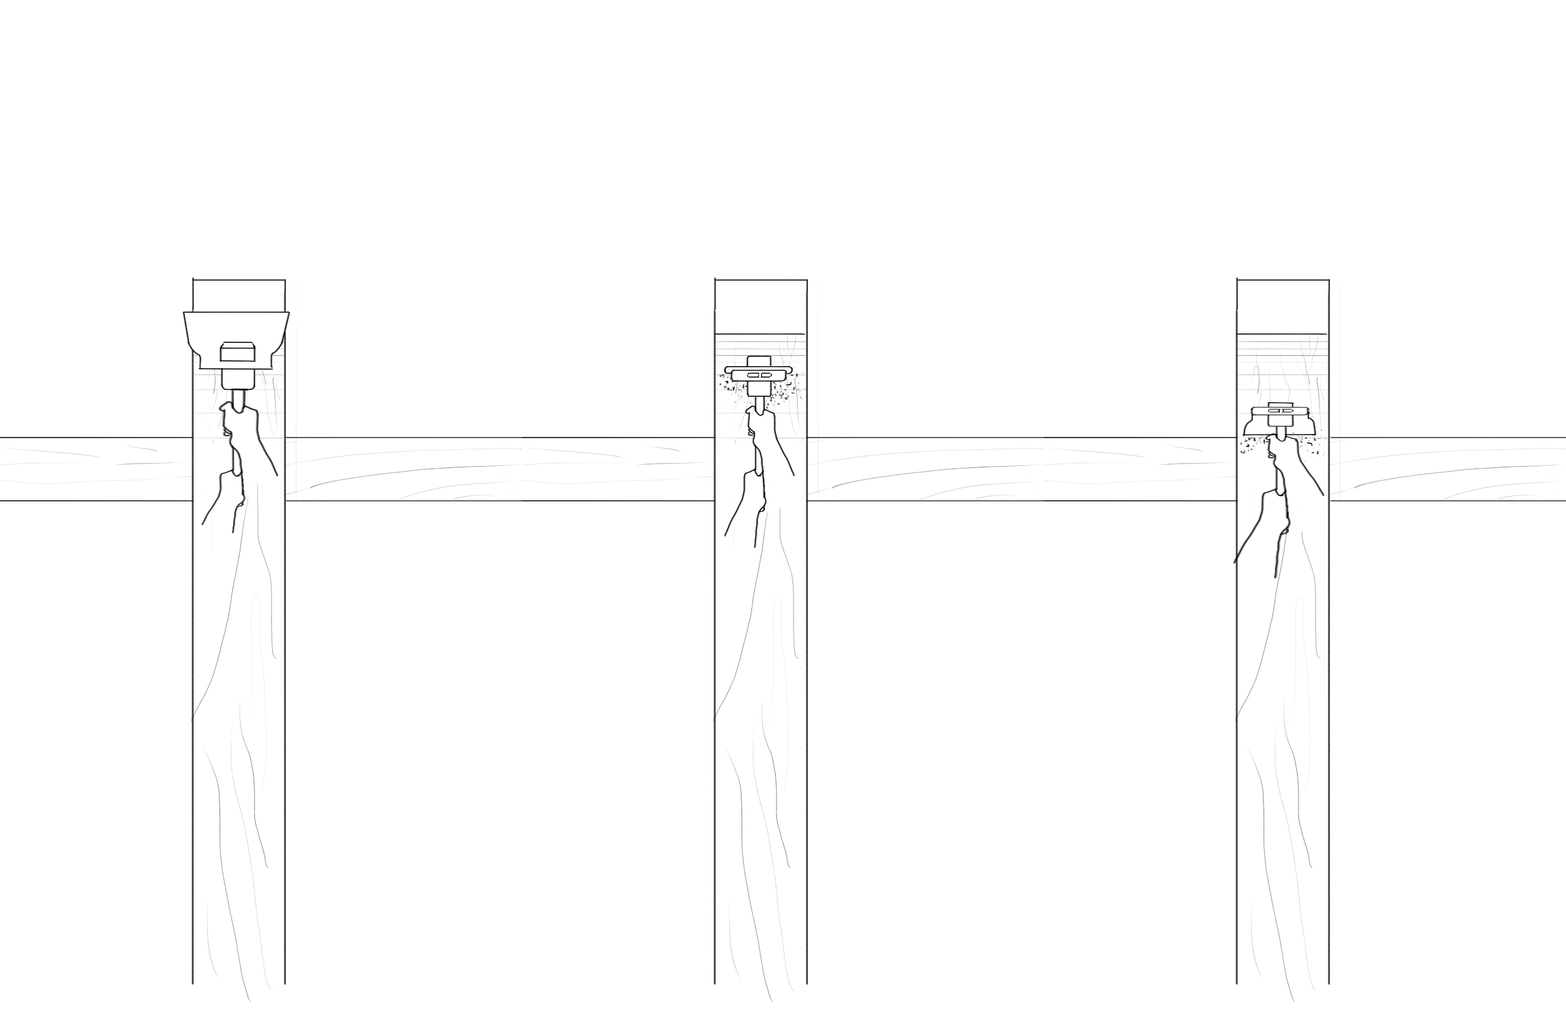
To attain the ideal and proper curviness for the boat stream line, a last round of shaping is required. They use their own custom-made hardwood stand and substantial wooden blocks for the initial shaping procedure.
The second shaping procedure requires placing them on two pieces of stabilizer wood. With a standing pole in the middle that links to the horizontal ribs,. The function of the support wood connects between the south and north vertical ribs and provides better stability.
The wood is then shaped into the appropriate dimensions and curve to match the installation of the boat.
Shaping
Stuffing Thread
To attain the ideal and proper curviness for the boat stream line, a last round of shaping is required. They use their own custom-made hardwood stand and substantial wooden blocks for the initial shaping procedure.
The second shaping procedure requires placing them on two pieces of stabilizer wood. With a standing pole in the middle that links to the horizontal ribs,. The function of the support wood connects between the south and north vertical ribs and provides better stability.
The wood is then shaped into the appropriate dimensions and curve to match the installation of the boat.
Painting
After assembling the wood planks onto the walls of the boat, the surface is then applied with paint according to the desired color of the client. The paint will help increase the resistance of the planks against the elements.


This is why we have creative archival.
